
Three-way wiring is an essential part of modern home electrical systems. It allows you to control a single light or set of lights from two separate switches.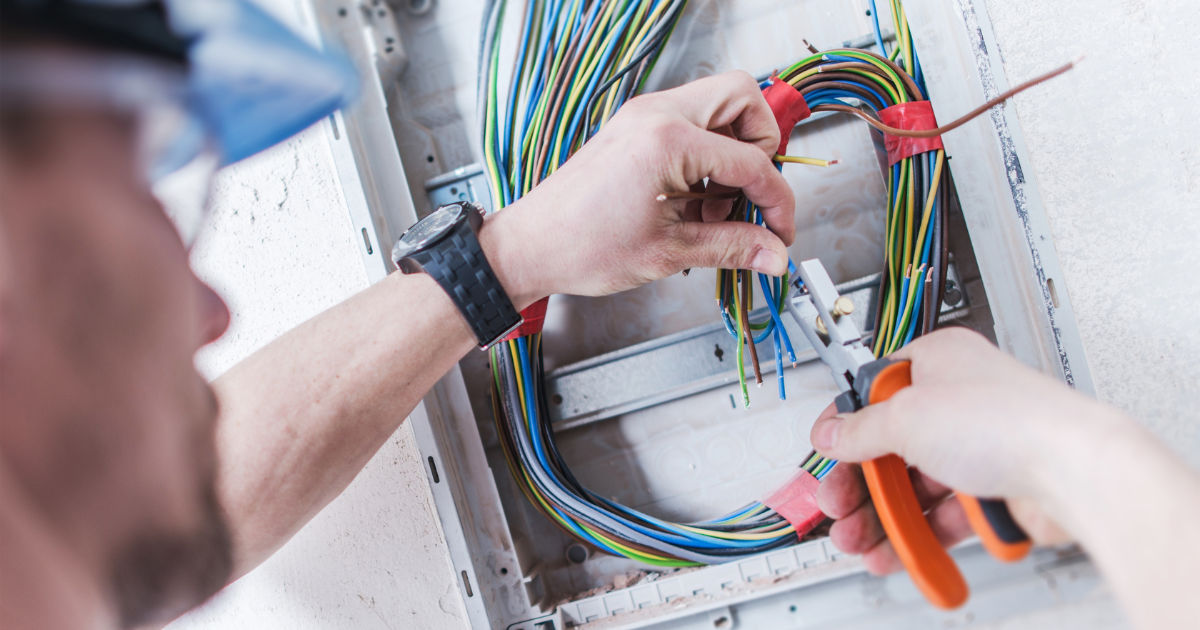
This setup is incredibly convenient, especially in large rooms, hallways, or staircases. However, faulty three-way wiring can cause a host of problems, including flickering lights, non-responsive switches, or even safety hazards.
Understanding how three-way wiring works and how to troubleshoot issues is crucial for anyone looking to maintain a safe and efficient electrical system.
This guide provides a step-by-step approach to planning new wiring for renovation projects, from understanding basic electrical concepts to implementing a safe and efficient wiring system with support from PowerLink Co Pakistan.
By the end of this guide, you will have a solid understanding of three-way wiring troubleshooting techniques and best practices to avoid future electrical issues.
Understanding Three-Way Wiring
Three-way wiring is a system that uses two switches to control a single lighting fixture. Unlike standard single-pole switches, which control lights from one location, three-way switches enable you to operate lights from two locations. This setup requires a specific configuration of wires, including travelers and a common wire, to function correctly.
Components of a Three-Way Wiring System
A typical three-way wiring setup includes:
-
Two three-way switches: Each switch has three terminals: one common and two traveler terminals.
-
Traveler wires: These wires connect the traveler terminals of the two switches, allowing current to flow between them.
-
Common wire: This wire connects the power source to the light fixture or the fixture to the switch, depending on the wiring setup.
-
Ground wire: Provides safety by preventing electrical shocks and ensuring proper grounding.
Understanding these components is the first step in troubleshooting faulty three-way wiring. Without a clear grasp of how each component works, diagnosing issues becomes challenging.
Common Problems in Three-Way Wiring Setups
Faulty three-way wiring can manifest in various ways. Identifying the specific problem is crucial to applying the correct troubleshooting method. Here are some common issues:
1. Lights Do Not Turn On or Off
If the lights do not respond when you operate either switch, the issue could be due to:
-
A broken or loose wire connection
-
Faulty switches
-
Incorrect wiring connections
2. Flickering Lights
Flickering lights in a three-way setup often indicate loose connections or a failing switch. Traveler wires that are not securely connected can cause intermittent power flow, resulting in flickering.
3. Switches Feel Loose or Do Not Click Properly
Physical problems with the switches themselves can also indicate faulty wiring. Worn-out or broken switches may prevent proper electrical contact, even if the wiring is correct.
4. One Switch Works, but the Other Doesn’t
This common problem usually points to miswired traveler wires or a faulty switch. It can also be caused by a break in the common wire.
Safety Precautions Before Troubleshooting
Before attempting to troubleshoot three-way wiring issues, safety should be your top priority. Working with electricity can be dangerous, and improper handling can lead to electrical shocks or fire hazards.
Here are essential safety steps:
-
Turn off power at the breaker: Always switch off the circuit breaker controlling the three-way wiring system before inspection.
-
Use a voltage tester: Confirm that the power is off using a reliable voltage tester.
-
Wear insulated gloves: This provides an extra layer of protection when handling wires.
-
Work in a well-lit area: Proper lighting helps prevent accidental contact with live wires.
By following these precautions, you minimize the risk of accidents while troubleshooting your three-way wiring setup.
Tools Needed for Troubleshooting Three-Way Wiring
Having the right tools makes troubleshooting much easier. Here is a list of tools commonly used:
-
Voltage tester or multimeter: To check for live wires and measure voltage
-
Screwdrivers: Both flathead and Phillips for removing switch covers
-
Wire strippers: To strip insulation from wires for inspection
-
Electrical tape: For securing wire connections
-
Needle-nose pliers: Useful for bending and connecting wires
With these tools, you can inspect, test, and repair most three-way wiring issues.
Step-by-Step Guide to Troubleshoot Faulty Three-Way Wiring
Troubleshooting three-way wiring can be challenging, but a systematic approach makes it manageable. Follow these steps to identify and fix issues.
Step 1: Inspect the Switches
Begin by examining both switches for physical damage. Look for cracks, burn marks, or loose components. If a switch looks damaged, replace it immediately.
Step 2: Test for Power
Turn the power back on briefly to test voltage at the switches. Use a voltage tester or multimeter to ensure the common wire receives power. If the common wire has no power, the issue may be in the circuit leading to the switch or the breaker itself.
Step 3: Identify Traveler Wires
Traveler wires are crucial for three-way wiring operation. They connect the traveler terminals of both switches. Using a multimeter, check for continuity between the traveler terminals when flipping switches. If continuity is missing, a wire may be broken or disconnected.
Step 4: Check Connections at the Light Fixture
Sometimes, the problem is not with the switches but with the light fixture. Turn off the power, remove the fixture cover, and inspect the wiring. Ensure all connections are secure and that no wires are frayed or disconnected.
Step 5: Replace Faulty Switches
If a switch is confirmed faulty, replace it with a new three-way switch. Ensure the wiring connections match the original setup, paying close attention to the common and traveler terminals.
Step 6: Re-Test the System
After replacing any faulty components, turn the power back on and test the system. Both switches should now operate the light fixture correctly. If the problem persists, continue inspecting wiring connections and consider consulting a professional electrician.
Advanced Troubleshooting Tips
For persistent issues, advanced troubleshooting may be necessary.
Using a Continuity Test
A continuity test helps identify breaks in the wiring. Using a multimeter, test each wire for continuous flow. This step is particularly useful for long runs where wires may have been damaged inside walls.
Labeling Wires
When dealing with complex wiring setups, labeling wires can prevent confusion. Use colored tape or markers to indicate which wire is a traveler and which is common. This method helps maintain consistency when reconnecting wires.
Inspecting Junction Boxes
Sometimes the problem lies in a hidden junction box. Open any accessible junction boxes along the circuit path and inspect the wire connections. Look for loose or corroded wires, as these are common culprits in faulty three-way wiring.
Common Mistakes to Avoid
Even experienced DIYers can make mistakes when working with three-way wiring. Avoid these common errors:
-
Mixing up traveler and common wires: Incorrect wiring leads to malfunctioning switches.
-
Over-tightening screws: Can damage the switch terminals or break wires.
-
Neglecting the ground wire: Grounding is essential for safety and proper functioning.
-
Skipping voltage tests: Never assume the power is off—always test before touching wires.
By being mindful of these mistakes, you reduce the risk of persistent issues and ensure your three-way wiring works efficiently.
When to Call a Professional Electrician
While troubleshooting can solve many problems, some issues are best handled by professionals. Consider calling an electrician if:
-
You cannot identify the problem after thorough testing
-
Wires are hidden inside walls and difficult to access
-
Multiple switches and fixtures are involved in a complex circuit
-
There are signs of electrical fire hazards, such as burn marks or sparks
Professional electricians have the expertise and tools to safely diagnose and repair complex three-way wiring setups.
Maintaining Three-Way Wiring for Longevity
Proper maintenance helps prevent future issues with three-way wiring. Here are some tips:
-
Regularly check switches: Ensure switches feel solid and click properly.
-
Inspect wiring connections: Loose or frayed wires should be corrected immediately.
-
Avoid overloading circuits: Excessive load can cause switches to fail prematurely.
-
Use quality components: Invest in high-quality switches and wiring materials.
Routine maintenance reduces the likelihood of faulty three-way wiring and extends the lifespan of your electrical system.
Conclusion
Three-way wiring is a practical and versatile solution for controlling lights from multiple locations. However, faulty setups can cause significant inconvenience and safety risks. By understanding the components, common problems, and systematic troubleshooting methods outlined in this guide, you can effectively diagnose and repair most issues.
From inspecting switches and testing wires to advanced continuity checks, following these steps ensures your three-way wiring operates smoothly and safely. Always prioritize safety, use the right tools, and consider professional assistance when necessary. Proper maintenance further guarantees long-term reliability and functionality.
With patience, careful attention to detail, and adherence to safety standards, troubleshooting three-way wiring becomes a manageable task, even for those without extensive electrical experience.