Category: Technology

How convert rar to zip file Works?How convert rar to zip file Works?

If you have ever dealt with file compression, you might have come across RAR and ZIP files.

Many people often want to convert rar to zip because ZIP files are more widely supported across different devices and operating systems.

But how does this process work? Why would you need it? And what tools can help you do it safely and efficiently?

This comprehensive guide will answer all your questions and provide a step-by-step understanding of converting RAR to ZIP files.

RAR and ZIP Files

Before we dive into how to convert rar to zip, it’s essential to understand what RAR and ZIP files are and why they exist.

What is a RAR File?

RAR stands for Roshal Archive, named after its creator, Eugene Roshal. RAR files are compressed archive files that can hold multiple files and folders in a single, smaller package. The main purpose of RAR files is to reduce the file size for storage and faster transfer.

Some key points about RAR files:

  • RAR files often have better compression rates than ZIP.

  • They are not natively supported by all operating systems. For example, Windows cannot open RAR files without third-party software.

  • RAR files support features like error recovery and splitting archives into multiple parts.

What is a ZIP File?

ZIP files are another type of compressed archive, created in the late 1980s. Unlike RAR, ZIP files are widely supported across almost all operating systems, including Windows, macOS, and Linux.

Advantages of ZIP files:

  • Easy to open without installing additional software.

  • Compatible with most operating systems and cloud storage services.

  • Can contain multiple files and folders in a single archive.

Why Convert RAR to ZIP?

There are several reasons someone might want to convert rar to zip:

  1. Compatibility: ZIP files are more universally supported than RAR files.

  2. Ease of use: Most users can extract ZIP files without installing additional software.

  3. Integration with services: Many email clients and cloud services prefer ZIP over RAR.

  4. Accessibility on mobile devices: ZIP files are easier to open on smartphones and tablets.

Understanding this makes it clear why converting RAR to ZIP can be useful in daily computing tasks.

Methods to Convert RAR to ZIP

There are multiple ways to convert rar to zip. You can use desktop software, online tools, or even command-line methods. Each method has its advantages and limitations.

Using Desktop Software

Desktop software is the most reliable way to convert RAR files to ZIP, especially for large files. Popular tools include WinRAR, 7-Zip, and WinZip.

Using WinRAR

WinRAR is one of the most popular tools for handling RAR files. Here’s how you can convert a RAR file to ZIP using WinRAR:

  1. Download and install WinRAR: Make sure you have the latest version from the official website.

  2. Open your RAR file: Right-click on the RAR file and select “Open with WinRAR.”

  3. Extract the contents: Click on the “Extract To” button and choose a folder where you want to save the files.

  4. Create a ZIP file: Select the extracted files, right-click, and choose “Add to archive.”

  5. Choose ZIP format: In the archive format options, select ZIP instead of RAR.

  6. Start conversion: Click OK, and WinRAR will create a ZIP file with the same content.

Using 7-Zip

7-Zip is a free and open-source alternative that also supports multiple formats:

  1. Download and install 7-Zip.

  2. Right-click the RAR file: Choose “7-Zip” → “Extract Here” to extract files.

  3. Select extracted files: Right-click on the files → “7-Zip” → “Add to archive.”

  4. Select ZIP format: In the archive options, choose ZIP as the format.

  5. Convert: Click OK to create a ZIP file.

7-Zip is lightweight and ideal for users who don’t want to purchase software like WinRAR.

Using Online Tools

Online converters are convenient if you only have a few small RAR files to convert. Popular online tools include Zamzar, Convertio, and CloudConvert.

Steps to Convert RAR to ZIP Online:

  1. Visit the website: Go to a trusted converter website.

  2. Upload your RAR file: Most platforms support drag-and-drop.

  3. Select ZIP as output format.

  4. Convert: Click the convert button and wait for the process to finish.

  5. Download your ZIP file.

Advantages of online tools:

  • No installation required.

  • Can be used on any device with internet access.

Limitations:

  • May have file size restrictions.

  • Privacy concerns for sensitive files.

  • Conversion speed depends on your internet connection.

Using Command-Line Tools

For advanced users, command-line tools like WinRAR CLI or 7-Zip CLI can automate the process. This is particularly useful for batch conversion.

Example using 7-Zip on Windows:

  1. Open Command Prompt.

  2. Navigate to the folder with the RAR file.

  3. Run the command:

7z x file.rar -ooutput_folder
7z a file.zip output_folder*

This extracts the RAR file and then compresses it into a ZIP format.

Advantages:

  • Batch processing multiple files quickly.

  • Full control over compression settings.

Limitations:

  • Requires knowledge of command-line syntax.

  • Not beginner-friendly.

Tips for Successful Conversion

While converting RAR to ZIP is generally straightforward, there are some tips to ensure a smooth process:

Check File Integrity

Before converting, ensure the RAR file is not corrupted. Trying to convert a corrupted file may lead to errors or incomplete ZIP archives. WinRAR and 7-Zip can test the integrity of RAR files.

Choose the Right Compression Level

ZIP files allow you to choose compression levels:

  • Fastest: Lower compression, faster creation.

  • Normal: Balanced size and speed.

  • Maximum: Higher compression, slower creation.

Choose based on your priority: speed or smaller file size.

Organize Your Files

If your RAR file contains many files or nested folders, check the structure before conversion. This ensures that your ZIP file maintains the same organization.

Backup Important Files

Always create a backup before converting, especially if the files are important. While rare, conversion errors can happen.

Common Issues and How to Fix Them

Even though converting RAR to ZIP is usually smooth, some issues can occur.

Corrupted RAR Files

Sometimes a RAR file may be partially downloaded or corrupted. WinRAR can attempt to repair these files.

Large File Size

If your RAR file is very large, online converters may fail. Use desktop software for files larger than 100MB to ensure reliability.

Password-Protected Files

Some RAR files are encrypted. You must know the password before conversion. Otherwise, the conversion will fail.

File Name Compatibility

Ensure file names do not contain special characters that ZIP format may not support. Rename files if necessary before conversion.

Benefits of Converting RAR to ZIP

Converting RAR to ZIP offers several benefits:

  1. Universal compatibility: ZIP files can be opened on almost any device.

  2. Ease of sharing: Most email providers and cloud services prefer ZIP files.

  3. Security options: ZIP supports password protection and encryption.

  4. Smaller file size for certain contents: Some file types compress better in ZIP format.

By converting RAR to ZIP, you make your files more accessible and manageable.

Best Practices for File Conversion

To get the best results when converting RAR to ZIP, follow these practices:

  • Use reliable software or trusted online converters.

  • Avoid converting large files on slow internet connections.

  • Keep backup copies before starting.

  • Use consistent naming conventions for easier organization.

Following these steps ensures smooth, error-free conversions.

Conclusion

Converting RAR to ZIP is a practical solution for improving file compatibility, ease of use, and accessibility across devices. Whether you use desktop software like WinRAR or 7-Zip, online tools, or command-line methods, the process is relatively straightforward.

Always remember to check file integrity, choose the right compression level, and back up important files. With these steps, converting RAR files to ZIP becomes a reliable method for file management and sharing.

This guide provides everything you need to understand how the process works and why it’s beneficial. Now you can confidently convert rar to zip whenever needed, making your digital file handling smoother and more efficient.

Windows 11 установка полный гайдWindows 11 установка полный гайд

Windows 11 скачать полное руководство для всех желающих

Windows 11 это новейшая операционная система разработанная Microsoft. Тысячи пользователей ищут запрос «скачать образ Windows 11», но важно помнить, что получать файл нужно только легально, чтобы избежать вирусов.

Зачем устанавливать Windows 11?

Система предлагает массу нововведений:

Улучшенный интерфейс

Более высокий уровень безопасности

Быстродействие системы

Работа с новыми стандартами

Оптимизация для гейминга

Минимальные требования

Перед загрузкой рекомендуется проверить, соответствует ли система требованиям.

Основные требования:

CPU 1 ГГц и выше

ОЗУ 4 ГБ

Диск от 64 ГБ

поддержка TPM

поддержка безопасной загрузки

Где скачать Виндовс 11 скачать 11 официально

Чтобы избежать проблем, берите образ только официально.

Получение системы включает:

Windows Update

инструмент установки

диск-образ

Как обновиться до Windows 11

Откройте меню настроек

Перейдите в обновления

Выберите проверку обновлений

Пройдите установку

Создание загрузочной флешки

Получите программу

Вставьте USB

Сделайте загрузочную флешку

Нужно ли платить?

Да, при наличии лицензии. Иначе нужен ключ.

Вывод

Многие ищут загрузку Windows 11. Основной совет загружать только оригинал. Это обезопасит компьютер.

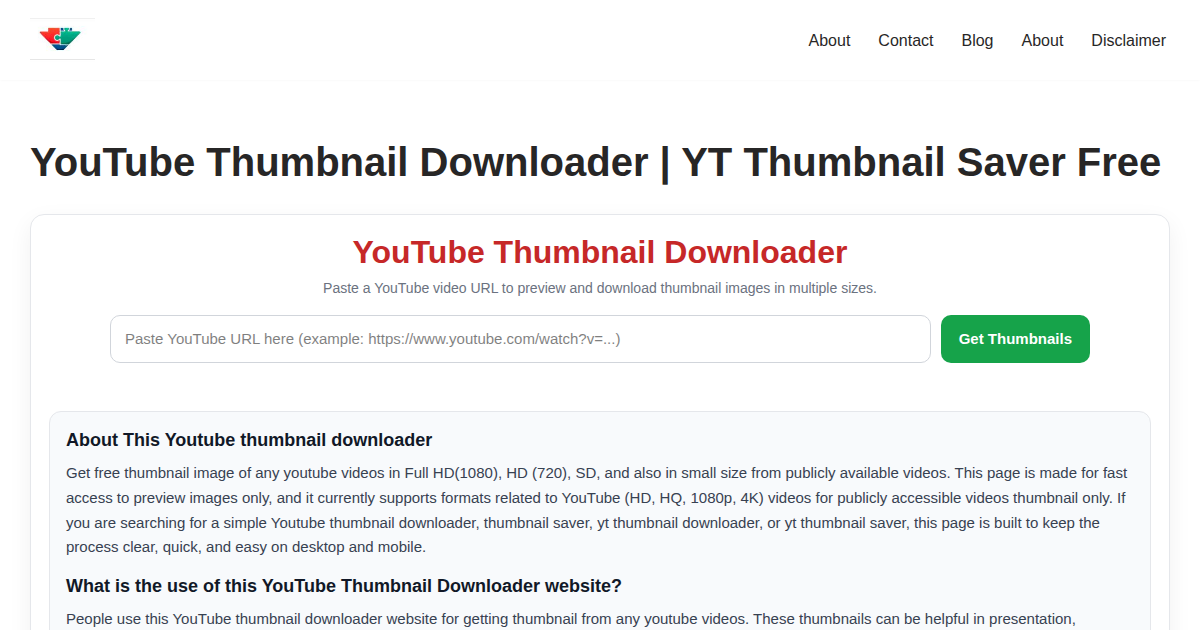
What Is Thumbnail Save JPG Format?What Is Thumbnail Save JPG Format?

If you have ever worked with images on your computer or mobile device, you may have noticed files with small previews or seen references to a Thumbnail Save option in JPG format.

But what exactly is a Thumbnail Save JPG format, and why does it matter in digital imaging?

In this comprehensive guide, we will explore everything you need to know about Thumbnail Save, how it works, why it is used, and the benefits and limitations of this feature.

By the end, you will have a clear understanding of this image-saving technique and how to use it effectively.

What Is a Thumbnail?

Before we dive into the Thumbnail Save JPG format, it is important to understand what a thumbnail is. A thumbnail is a smaller version of an image that is used to represent the full-size picture. It is often a scaled-down version that helps you quickly preview an image without opening it fully.

Thumbnails are widely used in:

  • Photo galleries

  • Video libraries

  • File explorers

  • Social media platforms

The main purpose of a thumbnail is to provide a quick visual reference, making it easier to organize and locate images. When you enable Thumbnail Save in JPG format, the software creates these small images automatically whenever you save or export a picture.

What Does JPG Format Mean?

The JPG (or JPEG) format is one of the most common image formats in the world. JPG stands for Joint Photographic Experts Group, which is the organization that created this compression standard.

Key characteristics of JPG images include:

  • Compression: JPG uses lossy compression to reduce file size. This makes it ideal for saving large collections of photos without taking up too much space.

  • Compatibility: JPG files are supported by nearly every device, operating system, and software.

  • Color Depth: JPG can store millions of colors, making it suitable for detailed photographs.

When you combine the JPG format with Thumbnail Save, the system creates a small, compressed preview of your image that is easy to store and view.

How Thumbnail Save Works in JPG Format

The Thumbnail Save JPG format works by embedding a smaller version of the main image into the file. This embedded thumbnail is separate from the original full-size image but is stored within the same JPG file.

Here’s how it works step by step:

  1. Image Creation: When you take a photo or create an image, the original high-resolution version is generated.

  2. Thumbnail Generation: The software automatically creates a miniature version of the image. This is typically much smaller, often around 160×120 pixels or less.

  3. Embedding in JPG: The thumbnail is embedded into the JPG file, along with the full-size image and metadata.

  4. Quick Preview: When you browse your images in a file explorer or gallery, the system loads the embedded thumbnail instead of the full-size image. This speeds up image previews and reduces processing time.

By using Thumbnail Save, you ensure that every JPG file carries its own preview image. This can be extremely useful for both personal and professional use.

Advantages of Using Thumbnail Save in JPG Format

Using Thumbnail Save in JPG format offers several advantages. Here are some of the most important ones:

Faster Image Browsing

One of the biggest benefits of Thumbnail Save is speed. When you open a folder with hundreds or thousands of images, the computer can load the embedded thumbnails quickly without opening the full-size images. This makes browsing your image library much faster.

Reduced System Load

Full-size images can be very large, sometimes several megabytes each. Loading multiple full-size images can slow down your system. Thumbnails reduce the load by allowing your device to show smaller versions.

Easier Organization

With thumbnails, you can visually identify images without opening each file individually. This makes organizing photos, selecting images for projects, or managing digital libraries much easier.

Compatibility Across Devices

JPG is widely supported, and thumbnails embedded within JPG files can usually be read by most image viewers, editors, and operating systems. This ensures that your previews are accessible no matter where you open the file.

Efficient for Backups

When you create backups or transfer image collections, the embedded thumbnails travel with the main image. This can be helpful for quick previews without extracting full-size images.

Limitations of Thumbnail Save in JPG Format

While there are many benefits, there are also some limitations to consider when using Thumbnail Save in JPG format.

Extra File Size

Although thumbnails are small, embedding them does slightly increase the overall file size of the JPG. In large image collections, this can add up.

Quality of Thumbnails

Thumbnails are low-resolution by design. They are meant for preview purposes only. If you try to enlarge a thumbnail, the image will become pixelated and lose clarity.

Redundant for Some Applications

Some modern image viewers generate thumbnails on the fly, making embedded thumbnails unnecessary. In such cases, enabling Thumbnail Save may not provide significant benefits.

Compatibility Issues in Rare Cases

While most devices and software support embedded thumbnails, certain older or specialized programs may not recognize them. This can lead to missing previews in rare situations.

How to Enable Thumbnail Save in JPG Format

The process of enabling Thumbnail Save depends on the software you are using. Here are general steps for common applications:

Using Adobe Photoshop

  1. Open your image in Photoshop.

  2. Go to File > Save As.

  3. Choose JPG as the file format.

  4. In the options dialog, check the box labeled Include Thumbnail or Thumbnail Save.

  5. Click Save.

Using Microsoft Windows

  1. Windows automatically generates thumbnails for most JPG files.

  2. To ensure thumbnails are displayed, open File Explorer > View > Options.

  3. In the View tab, make sure Always show icons, never thumbnails is unchecked.

Using MacOS

  1. MacOS generates thumbnails automatically in Finder.

  2. Ensure Thumbnail Save is enabled in third-party software if exporting images.

Using Other Photo Editors

Most modern photo editing software, such as GIMP, CorelDRAW, and PaintShop Pro, offer an option to include thumbnails when saving images in JPG format. Always look for terms like Include Thumbnail, Embed Preview, or Thumbnail Save in the save/export options.

Practical Applications of Thumbnail Save JPG Format

The Thumbnail Save JPG format is not just a technical feature; it has practical applications in real-world scenarios.

Digital Photography

Professional photographers often deal with thousands of images. Embedded thumbnails help them quickly sort through their shots without opening each file, saving time and improving workflow.

E-Commerce

Online stores frequently use thumbnails to showcase products. By saving product images in JPG format with embedded thumbnails, websites can display quick previews without loading the full image, improving user experience.

Social Media Management

Social media managers work with hundreds of images daily. Using Thumbnail Save helps them quickly locate specific images, plan content, and upload previews efficiently.

Media Libraries and Archives

Libraries, museums, and digital archives store vast collections of images. Embedded thumbnails allow users to browse archives quickly, identify images, and access metadata without opening every file.

Video Editing

Video editors often use JPG thumbnails for frames and storyboards. Saving frames with Thumbnail Save allows quick access to key moments without loading high-resolution images.

Technical Details of Thumbnail Save

To understand Thumbnail Save JPG format, it is helpful to know some technical details:

  1. EXIF Data: Thumbnails are often stored in the EXIF metadata of JPG files. This is the same section that stores camera settings, GPS location, and date/time information.

  2. Compression: Thumbnail images are compressed to reduce file size, typically using the same JPEG algorithm.

  3. Size: Most thumbnails are around 160×120 pixels, though some software allows larger sizes.

  4. Multiple Thumbnails: Some advanced software may store multiple thumbnails for different resolutions.

Tips for Using Thumbnail Save Effectively

To get the most out of Thumbnail Save JPG format, consider these tips:

  • Always check your software settings to ensure thumbnails are embedded when saving.

  • Use thumbnails for browsing and organization, but rely on full-size images for editing and printing.

  • Be aware of extra file size if you are managing thousands of images.

  • Backup images regularly, including thumbnails, to maintain quick previews.

  • Avoid relying solely on thumbnails for critical image quality assessment.

Thumbnail Save vs On-the-Fly Thumbnails

It is important to distinguish between Thumbnail Save and on-the-fly thumbnail generation:

  • Thumbnail Save: Creates a small image and embeds it in the JPG file. The thumbnail is stored permanently and can be accessed without opening the full image.

  • On-the-Fly Thumbnails: Generated by operating systems or software when browsing folders. These thumbnails are temporary and do not increase the JPG file size.

Embedded thumbnails are useful for sharing images across devices, ensuring that previews are always available, while on-the-fly thumbnails depend on system resources and software capabilities.

Conclusion

The Thumbnail Save JPG format is a valuable feature for anyone who works with digital images. By embedding small previews directly into JPG files, it provides faster browsing, easier organization, and improved workflow efficiency. While there are minor limitations, such as slightly increased file size and low-resolution previews, the benefits far outweigh these drawbacks.

Whether you are a professional photographer, an e-commerce manager, a social media professional, or simply someone who enjoys organizing personal photos, understanding Thumbnail Save can make managing your images much easier. By enabling this feature and using it effectively, you ensure that your digital library is both accessible and efficient.

In the age of digital media, Thumbnail Save JPG format represents a small but powerful tool that enhances productivity and user experience. Remember to always balance the use of thumbnails with full-size images, use compatible software, and maintain backups to maximize the benefits of this feature.

In short, Thumbnail Save is more than just a technical option—it is an essential component of modern digital image management.

Why Pic to Text Multi Language?Why Pic to Text Multi Language?

In today’s fast-moving digital age, Pic to Text technology is transforming the way we interact with information. From students to business professionals, everyone is using Pic to Text tools to convert images into editable and searchable content. As communication becomes more global, the need for Pic to Text multi language solutions continues to grow.

The ability to extract written content from images is no longer a luxury. It is a necessity. Pic to Text systems allow users to capture printed or handwritten material and turn it into digital text within seconds.

When this process supports multiple languages, Pic to Text becomes even more powerful.

In this comprehensive guide, we will explore why Pic to Text multi language technology is essential, how it works, its benefits, real-world applications, and what the future holds.

By the end, you will clearly understand why Pic to Text is shaping global communication and digital productivity.


Understanding Pic to Text Technology

What Is Pic to Text?

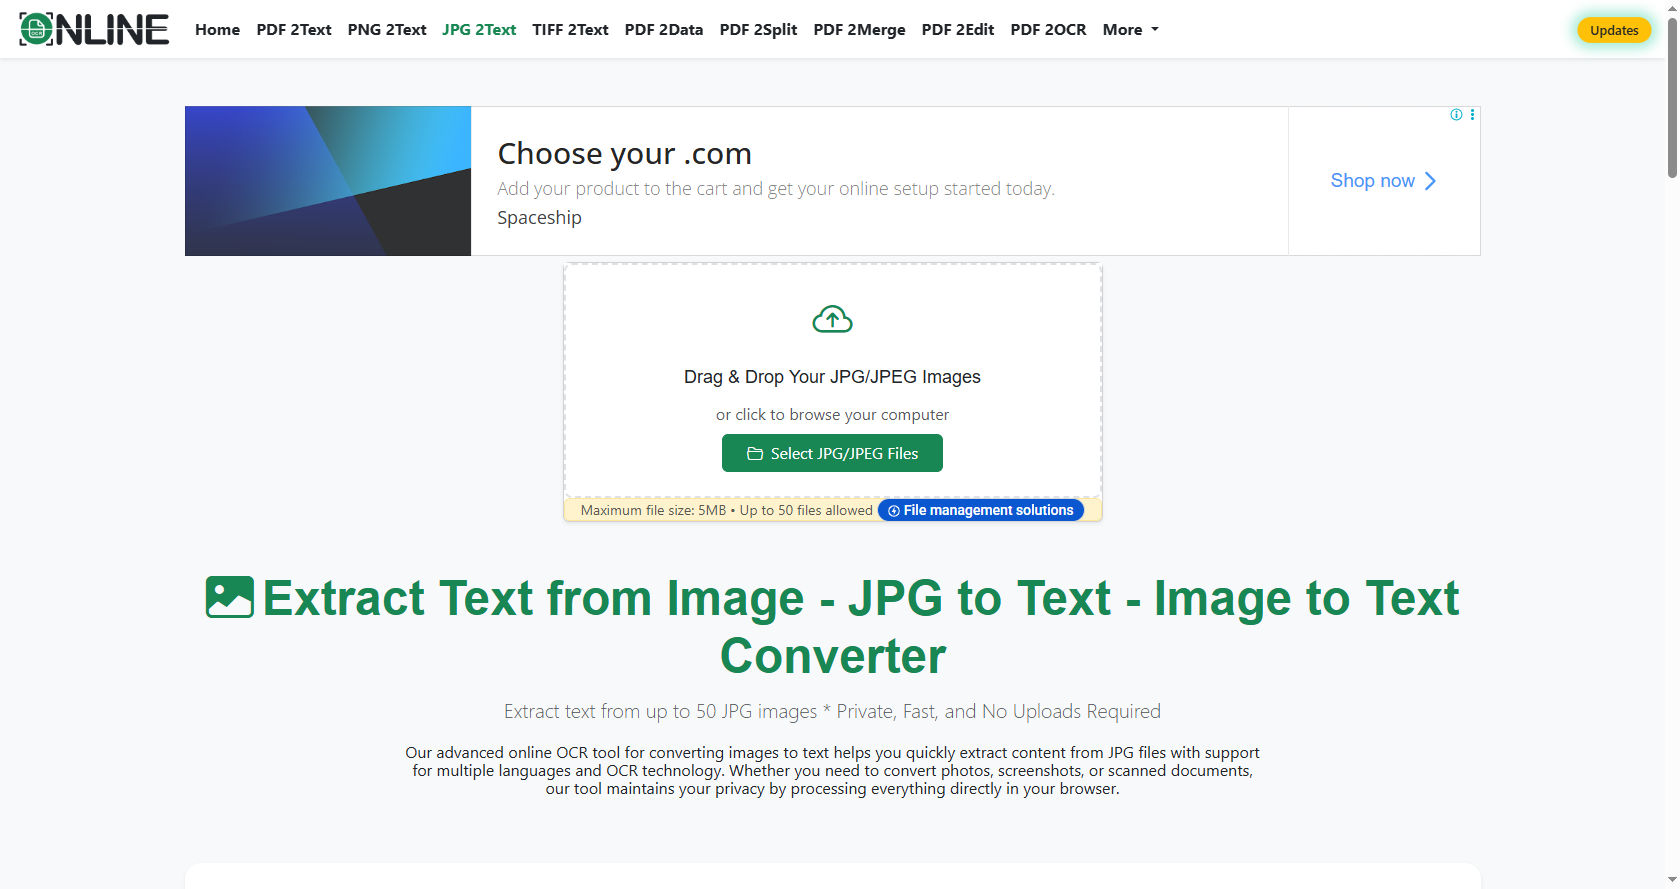
Pic to Text is a technology that converts images containing written content into editable digital text. It uses Optical Character Recognition (OCR) to scan letters, words, and numbers from photos, screenshots, or scanned documents.

When you upload an image into a Pic to Text tool, the software analyzes patterns in the picture. It identifies characters and converts them into readable and editable text. This process saves time and removes the need for manual typing.

Modern Pic to Text tools can recognize different fonts, handwriting styles, and even complex layouts. With artificial intelligence improving daily, Pic to Text accuracy has significantly increased.

How Pic to Text Works

The process behind Pic to Text involves several steps:

  1. Image acquisition

  2. Pre-processing to improve clarity

  3. Character recognition

  4. Text conversion

  5. Output formatting

Advanced Pic to Text systems use machine learning to improve recognition accuracy. The more the system processes data, the smarter the Pic to Text engine becomes.


The Importance of Multi Language Support

Breaking Language Barriers

One of the biggest advantages of Pic to Text multi language support is its ability to break language barriers. Businesses operate globally. Students study international material. Travelers explore foreign countries. A multi language Pic to Text tool helps users extract and understand content in various languages.

Imagine taking a photo of a document written in Spanish, French, Arabic, or Chinese. A multi language Pic to Text tool can convert that image into editable text instantly.

Supporting Global Communication

Globalization has increased cross-border communication. Companies collaborate across continents. Government organizations share international documents. In these situations, Pic to Text multi language tools ensure that information is accessible to everyone.

Without multi language Pic to Text, users would struggle to convert foreign language documents. With it, communication becomes smooth and efficient.


Key Benefits of Pic to Text Multi Language Tools

Time-Saving Efficiency

Typing long documents manually can take hours. Pic to Text reduces this work to seconds. When multi language capability is added, Pic to Text becomes even more useful for international tasks.

Students can scan textbooks. Professionals can digitize reports. Researchers can extract global studies. All thanks to Pic to Text technology.

Improved Productivity

Productivity increases when repetitive tasks are automated. Pic to Text eliminates manual data entry. Multi language support ensures that no matter the language, the task can be completed quickly.

Businesses that use Pic to Text often experience faster workflow and improved document management.

Enhanced Accessibility

Accessibility is another major advantage of Pic to Text multi language tools. People with visual difficulties can convert images into readable digital formats. Text-to-speech systems can then read the converted text aloud.

By combining accessibility features with Pic to Text, technology becomes more inclusive.

Accurate Data Extraction

Modern Pic to Text systems use AI-powered recognition to improve accuracy. Multi language models are trained to understand grammar, accents, and special characters. This makes Pic to Text reliable even for complex documents.

Accurate data extraction ensures that businesses avoid costly mistakes.


Real-World Applications of Pic to Text Multi Language

Education Sector

In education, Pic to Text plays a major role. Students often capture notes from whiteboards, textbooks, or printed handouts. With multi language Pic to Text, international students can convert foreign material into editable content.

Researchers also use Pic to Text to digitize old manuscripts written in different languages.

Business and Corporate Use

Businesses deal with invoices, contracts, receipts, and reports daily. Pic to Text simplifies document management. Multi language Pic to Text tools allow companies to process documents from global partners.

For example, a company importing goods from another country can scan invoices using Pic to Text and store the extracted information digitally.

Travel and Tourism

Travelers often encounter foreign signs, menus, or instructions. With Pic to Text multi language tools, they can capture images and convert them into readable text.

This makes navigation easier and reduces confusion during travel.

Healthcare Industry

Healthcare providers often receive medical records in different languages. Multi language Pic to Text helps convert these records into digital text for easier analysis and storage.

By using Pic to Text, hospitals can improve patient data management.


Features to Look for in a Pic to Text Multi Language Tool

Wide Language Support

The most important feature of a multi language Pic to Text tool is broad language compatibility. It should support major global languages and regional dialects.

High Accuracy Rate

Accuracy determines how useful Pic to Text will be. Advanced AI improves character recognition and reduces errors.

User-Friendly Interface

A simple design ensures that anyone can use Pic to Text without technical knowledge.

Fast Processing Speed

Speed matters in professional environments. A reliable Pic to Text tool should process images quickly without compromising accuracy.

Secure Data Handling

Since documents may contain sensitive information, Pic to Text systems must offer secure processing and data protection.


Challenges in Multi Language Pic to Text Technology

Complex Scripts and Fonts

Some languages have complex characters and writing styles. This makes Pic to Text recognition more challenging.

Developers continuously improve Pic to Text algorithms to handle these difficulties.

Handwritten Text Recognition

Handwriting varies from person to person. Multi language Pic to Text systems must adapt to different writing styles.

AI-powered Pic to Text tools are becoming better at recognizing handwritten content.

Image Quality Issues

Blurry or poorly lit images reduce accuracy. For best results, Pic to Text works best with clear and high-resolution images.


The Role of Artificial Intelligence in Pic to Text

Artificial intelligence is the backbone of modern Pic to Text systems. Machine learning models analyze millions of text samples to improve recognition.

AI allows Pic to Text to understand context, grammar, and language patterns. In multi language environments, AI ensures that Pic to Text identifies correct characters even when scripts differ greatly.

As AI evolves, Pic to Text will become even faster and more accurate.


Why Businesses Should Invest in Pic to Text Multi Language Solutions

Businesses handle large volumes of paperwork. Manual entry wastes time and increases errors. By adopting Pic to Text, companies streamline operations.

Multi language Pic to Text tools are especially useful for international companies. They help convert foreign contracts, agreements, and records into editable digital files.

Investing in Pic to Text technology reduces costs and improves efficiency.


Future Trends in Pic to Text Multi Language Technology

Integration with Mobile Apps

Mobile applications increasingly include Pic to Text features. Users can capture images directly from smartphones and convert them instantly.

Cloud-Based Processing

Cloud technology enhances Pic to Text by allowing faster processing and storage.

Real-Time Translation Integration

Future multi language Pic to Text tools may combine OCR with instant translation. This would allow users not only to extract text but also to translate it immediately.

Voice and Text Integration

Combining voice recognition with Pic to Text could create powerful communication tools for global users.


How Students Can Benefit from Pic to Text

Students often work with printed notes, worksheets, and reference books. Pic to Text helps them digitize information quickly.

Multi language Pic to Text is especially helpful for language learners. It allows them to capture foreign text and convert it into editable format for study.

By using Pic to Text, students can organize notes more efficiently and focus more on learning.


Tips for Getting the Best Results with Pic to Text

  1. Use high-quality images.

  2. Ensure proper lighting.

  3. Keep documents flat and aligned.

  4. Choose a reliable multi language Pic to Text tool.

  5. Review the converted text for minor errors.

Following these tips will improve Pic to Text accuracy and efficiency.


Security and Privacy Considerations

When using Pic to Text, especially for sensitive documents, security is important. Users should select platforms that protect data with encryption.

Multi language Pic to Text services that operate securely help businesses and individuals maintain privacy.

Always review the privacy policy before uploading confidential documents into a Pic to Text system.


Conclusion

The digital world is becoming more connected every day. Communication across languages is no longer optional; it is essential. Pic to Text multi language technology plays a vital role in making information accessible to everyone.

From students and teachers to businesses and healthcare providers, Pic to Text simplifies the process of converting images into editable text. When multi language support is added, Pic to Text becomes a global communication tool.

It saves time. It increases productivity. It improves accessibility. It enhances accuracy. Most importantly, Pic to Text removes language barriers and supports international collaboration.

As artificial intelligence continues to improve, the future of Pic to Text looks promising. We can expect faster processing, better handwriting recognition, and seamless integration with translation tools.

In a world driven by digital information, Pic to Text multi language solutions are not just helpful—they are necessary. Embracing Pic to Text technology today means preparing for a smarter, more connected tomorrow.

Web Hosting Payment with Crypto: Pro TipsWeb Hosting Payment with Crypto: Pro Tips

When people search for easier, faster, and more private ways to manage digital services, many discover that they can buy hosting with crypto instead of relying only on traditional payment methods.

This trend has grown quickly because cryptocurrency offers global access, low fees, and an additional layer of financial independence.

But while the idea of being able to buy hosting with crypto sounds simple, the process can become confusing if you don’t know what to look for.

This guide breaks everything down clearly. You’ll learn how crypto payments for hosting work, why people prefer them, how to avoid common mistakes, and how to choose the right provider.

Whether you’re a beginner or someone who already uses digital assets, these practical tips will help you confidently buy hosting with crypto without running into unnecessary problems.


What It Means to Buy Hosting with Crypto

When you decide to buy hosting with crypto, you are paying for server space using digital currency instead of fiat money like USD or EUR. This includes popular hosting types such as shared hosting, VPS hosting, dedicated hosting, and cloud hosting.

Choosing to buy hosting with crypto gives you the ability to control your transactions directly, using wallets you own. This eliminates the need for traditional banking systems. It also opens the door for users who live in regions where international payments are restricted.

People often buy hosting with crypto for three reasons: privacy, convenience, and speed. Each transaction is processed through the blockchain, which makes it secure while also reducing payment delays.


Why More People Buy Hosting with Crypto

There are several strong reasons why someone might choose to buy hosting with crypto instead of paying with a credit card or bank transfer.

Privacy and Control

When you buy hosting with crypto, you do not need to share sensitive banking information. This appeals to users who value privacy. Instead of giving out personal financial details, you complete the payment directly from your crypto wallet.

Global Accessibility

Crypto works across borders. If someone wants to buy hosting with crypto from a country with limited access to international banking, crypto payments offer a solution. With just a wallet and an internet connection, anyone can make the payment instantly.

Faster Transactions

Traditional bank transfers can take days. When you buy hosting with crypto, your payment can clear in minutes. This is especially useful if you need hosting immediately or need to renew a service quickly.

Lower Fees

Many users buy hosting with crypto because they want to avoid high transaction fees. Crypto payments usually cost less and sometimes have almost no extra charges.


Types of Hosting You Can Buy with Crypto

You can buy hosting with crypto for nearly every type of hosting plan. Understanding each option helps you make the right choice.

Shared Hosting

Shared hosting is the most affordable option. When you buy hosting with crypto for this type of plan, you share server resources with other users. It is ideal for blogs, small business websites, or portfolios.

VPS Hosting

A VPS, or virtual private server, gives you more control and dedicated resources. Many developers and growing businesses prefer to buy hosting with crypto for VPS plans because they need stronger performance and flexibility.

Dedicated Hosting

With dedicated hosting, you get an entire server to yourself. Businesses with heavy traffic often buy hosting with crypto for this option because it offers maximum speed and security.

Cloud Hosting

Cloud hosting uses multiple connected servers to keep your website online. If you buy hosting with crypto for cloud-based platforms, you can scale your resources up or down based on demand.


How to Prepare Before You Buy Hosting with Crypto

Before you complete your first transaction, take a few simple steps to ensure your experience goes smoothly.

Choose a Secure Wallet

To buy hosting with crypto, you need a secure wallet. This can be a hardware wallet, software wallet, or mobile wallet. The key is that you control your private keys.

Understand Network Fees

When you buy hosting with crypto, each transaction includes a network fee. These fees change depending on the blockchain. Understanding fees helps you avoid overpaying or missing a payment deadline.

Double-Check Your Wallet Address

Crypto transactions can’t be reversed. If you want to buy hosting with crypto safely, always double-check the wallet address before sending funds.

Keep Spare Crypto for Renewals

Hosting often requires renewals. If you plan to buy hosting with crypto long-term, keep extra funds in your wallet so your website never goes offline.


Step-by-Step Guide to Buying Hosting with Crypto

Here is a simple and practical process you can follow anytime you want to buy hosting with crypto.

Step 1: Select Your Hosting Plan

Decide whether you need shared, VPS, dedicated, or cloud hosting. Make sure the plan meets your performance and storage needs.

Step 2: Choose Your Crypto Payment Option

When you buy hosting with crypto, you may be allowed to use tokens such as Bitcoin, Ethereum, USDT, USDC, Litecoin, or others. Select the one that fits your wallet.

Step 3: Place Your Order

Proceed to the order page and select crypto as your payment method. You’ll receive a unique payment address generated specifically for your transaction.

Step 4: Send the Exact Amount

Send the exact amount of cryptocurrency in a single transaction. When you buy hosting with crypto, sending the wrong amount can delay the activation.

Step 5: Wait for Confirmation

Blockchain confirmations usually take a few minutes. After that, your hosting service will be activated.


Practical Tips to Buy Hosting with Crypto Safely

Using crypto for everyday payments can be extremely convenient, but safety should always come first. Here are expert-level tips to help you buy hosting with crypto securely.

Avoid Using Public Wi-Fi

Public internet connections increase the risk of hacks. When you buy hosting with crypto, always use a secure network.

Enable Two-Factor Authentication

Protecting your wallet with two-factor authentication adds an extra security layer.

Monitor Price Volatility

Crypto prices can rise and fall quickly. When planning to buy hosting with crypto, keep an eye on market conditions so you don’t overpay.

Keep Transaction Records

Even though crypto is decentralized, you should still keep track of your payments. Record timestamps and wallet addresses after you buy hosting with crypto.

Use Stablecoins When Possible

Many people prefer to buy hosting with crypto using stablecoins like USDT or USDC because their value remains consistent. This avoids price fluctuations during checkout.


Common Mistakes to Avoid When Paying With Crypto

Even experienced users sometimes make errors when trying to buy hosting with crypto. Avoid these common mistakes.

Sending Funds to the Wrong Address

Crypto transactions cannot be reversed. Always verify the address when you buy hosting with crypto.

Waiting Too Long to Pay

Crypto price changes can invalidate the required payment amount. Complete the transaction quickly.

Forgetting About Network Fees

If you don’t include network fees, your transaction may not be processed. This can delay your attempt to buy hosting with crypto.

Using Unsupported Tokens

Attempting to buy hosting with crypto using an unsupported token will result in lost funds. Always check supported currencies.


Advantages of Paying for Hosting with Cryptocurrency

Choosing to buy hosting with crypto comes with multiple benefits that appeal to beginners, tech users, freelancers, developers, and businesses.

More Control Over Your Funds

With crypto, you own the assets directly. When you buy hosting with crypto, you avoid relying on banks or payment gateways.

No Third-Party Restrictions

Some countries have strict payment limits. Crypto offers freedom to buy hosting with crypto without worrying about international barriers.

Better Budgeting

Crypto payments are transparent. You can easily track each transaction, making it easier to manage business expenses.

Faster Account Activation

Traditional payments may take time to process. But when you buy hosting with crypto, your service is often activated within minutes.


Buying Hosting With Crypto for Business Use

More businesses than ever are choosing to buy hosting with crypto for their online operations.

Easy Cross-Border Transactions

Companies working globally appreciate the ability to buy hosting with crypto without dealing with currency conversion fees.

Improved Financial Privacy

Businesses that want to reduce exposure of their financial accounts prefer this method.

Better Speed for Urgent Deployments

When launching a new website or platform quickly, being able to buy hosting with crypto speeds up deployment.


FAQs About Buying Hosting with Crypto

Is it safe to buy hosting with crypto?

Yes, as long as you use a secure wallet and follow best practices such as double-checking addresses.

What happens if my crypto value changes?

If you choose to buy hosting with crypto using stablecoins, you can avoid value fluctuations.

Can beginners buy hosting with crypto?

Absolutely. The process is simple and beginner-friendly.

Which hosting types support crypto payments?

You can buy hosting with crypto for shared hosting, VPS hosting, dedicated servers, and cloud plans.


Final Tips for a Smooth Experience

When planning to buy hosting with crypto, always stay prepared. Keep your wallet secure. Maintain spare funds. Track your transactions. And choose a hosting plan that matches your project needs.

Crypto payments are becoming more popular every year, and the ability to buy hosting with crypto is now one of the easiest ways to blend technology with financial independence. Whether you’re launching a blog, an e-commerce site, a portfolio, or an application, crypto payments make the process smoother and more accessible.


Conclusion

The world of digital payments keeps evolving, and learning how to buy hosting with crypto gives you a major advantage. Cryptocurrency offers privacy, global accessibility, low fees, and fast processing times. For anyone who values financial control and efficiency, choosing to buy hosting with crypto is a modern, practical solution.

By understanding how crypto transactions work, choosing secure wallets, double-checking addresses, selecting supported coins, and planning ahead for renewals, you can buy hosting with crypto confidently and avoid common issues.

As more users adopt blockchain-based payments, the ability to buy hosting with crypto will continue to become even more common. Whether you're a beginner or a seasoned professional, these pro tips give you everything you need to navigate the process with ease.